Thursday, April 29, 2010

Random thoughts

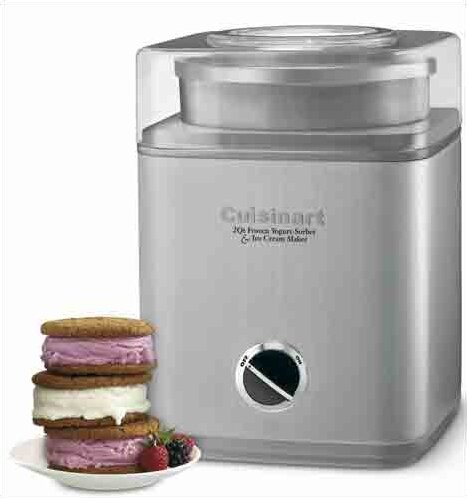
First of all, i have to say: OH MY GODDESS! I just won an ice cream maker!!!  it was on  the blog Passionate about Baking, which i've been following because it has SCRUMPTIOUS looking recipes. They recently had a give-away for an ice-cream maker and i was the randomly chosen winner! YAY! *does happy dance* I am so psyched.... i don't think i've won anything 'free' since high school!

 (via )

i think i've found my perfect 'base recipe' for baking bread. Of course, it'll never turn out the exact same twice, but this recipe is pretty simple, and unlike most 'whole wheat' recipes it actually IS 100% whole wheat (some of those recipes are so.... misleading. I hate that.)


The recipe i've found is from CDKitchen and the link is here. I have made it twice so far, and while i'm following the ingredients exactly (for now at least!) i'm using different instructions, as i'm making it all by hand. if you'd like to try it the way i have, just print out the recipe, then follow along here:

tools needed: large bowl, wooden spoon, flat surface (optional), measuring cups and spoons, tea towel, bread pan(s)

In large bowl, sprinkle yeast over warm water. Let stand 10 mins then stir in.
Dump in all flour EXCEPT 1/4 cup (per batch), as well as the salt and honey. stir until evenly lumpy.
Add the milk, oil, and eggs. Mix thoroughly. This dough is very sticky.
Dump in the reserved flour, and mix it in.
If using a flat surface, flour it, and dump out the dough onto it. If doing it my way (less mess = better) sprinkle a few tablespoons of flour on top of the dough, as well as getting it around the sides and to the bottom. Put a little extra in the bottom of the bowl (to do this, pull the dough away from the sides one side at a time, and sprinkle flour down the crack. turn and repeat.)
Using either method, knead for at least a minute, adding more flour as required.
Place bread back into bowl (if necessary). Pour about 1tsp oil on top, and spread it around on all exposed surfaces (this prevents it from drying out!)
Cover with tea towel, and set in a warm place (i have a cold house, so i use my oven with just the light on.)
When the dough has risen to double its original size, punch it down. (I do this a second time as well... it seems to make a lighter loaf)
Grease all bread pans with butter. Shape bread and place into the pan. cover again with towel.
Let rise once more to double, while heating oven to 375F.
Place dough in oven, an bake for 35-40 mins.

To test done-ness for bread, dump out of pan onto a cookie rack. Tap the bottom with your knuckles. If it sounds hollow, it's cooked.
Turn bread out onto racks, and cool. I like to spread a little butter on the top while it's still warm, as it gives a chewier crust.

Please note: this recipe makes a LARGE loaf.  When i tripled the recipe, i had to use three large pans to fit the dough in. if you are using 'medium' pans, there may be extra dough, (i'd use 4 medium pans for a triple batch, i think)


Other randomness: i've been doing a lot of spinning (both at last weekends' trainer and otherwise) and if anyone is interested in handspun wool, or drop spindles, drop me a line. i'm always willing to barter!

my seedlings are growing by leaps and bounds... going to need to repot some this week, and take some to their 'final homes' (the ones i'm giving to family)so i can have more room on my window sills.
Monday, April 19, 2010

for the love of spinning

One of the things i enjoy most about my Living history hobby is the time i get to spend taking wool 'from sheep to sock'... that is cleaning, combing, spinning,dying and finally naalbinding it.
one of the mid-weigh spindles and some yarn spun from it

i finished my WIP drop spindles, and did some 'test spinning' on the different weights. here are some of the results
 light weight on the left, then medium, and heavy
at a guess, the first is lace weight as a 1-ply, the heaviest is perhaps a sport weight.

 close up of the same

 i have this crazy idea that i want to save all of the light weight that i end up spinning, and eventually buy/make a loom (preferably a viking-style warp-weighted loom) and test my hand at weaving. I think the light wool would be perfect for weft, and would make a nice mid-weight fabric.

 a light spindle, full of thread-like yarn

 i'm slowly taking bites out of my BAGS full of raw wool, washing, carding/combing and spinning it. i still have.. oh, at least 15lbs of wool to go though! (yikes!)

i would love to get a carding machine. that has to be the one step i like LEAST about getting the wool ready. hand combing/carding/flick carding is just not the same. it's okay for a show, or small batches, but i'd like to be able to do more, and larger batches!

After Finishing my first set of drop spindles, i decided that i would make further medium and small ones, as i know i want more than one weight of each for myself (one way to make 2-ply yarn is to spin onto two same-weight spindles, then ply (reverse spin) them together onto a third (often heavier) spindle)

I'm also mid-packing and preparing for our next event. it's a trainer (not open to the general public event) in SK and it's this weekend. i still have so much to pack!

on another note, my seedlings are growing by leaps and bounds... have had to transplant my acorn squash into larger containers, and will be doing the same with some of my other seedlings in the next day or two

Tuesday, April 13, 2010

of houses, dreams, and the future

i read a blog today in which the lady blogger was talking about her dream community, and how it would be back-to-the earth, barter is good types. i like those ideas. it reminded me of recent conversations with my mother about housing, and sub-terranian housing in particular.
Over the years, much as 'average' young ladies dream of their wedding day, i have dreamed of a house. Specifically, MY house. one i will own. eventually. The design and materials have changed over time, but the overall logic and dream have remained. I want to own a 'lifer' home, one that i can live in until i die, not some 'starter home' (man, i hate even the idea of that) that  i'll have to sell a few years down the road to get the next bigger better place.

My dream house has a large common room, which would contain kitchen, dining and living rooms combined. It will run partly on wood heat. it will have 3 bedrooms, and the bathroom will have a tub big enough for me to actually enjoy (i'm 5'10", and conventional tubs are just a pain in the..... back. i can't even imagine how really tall people could stand them!)

My dream house would also have a large cellar/cold storage space, and a Meadery (translate that as essentially a cool storage room with lots of wine racks) It will have as few stairs as possible (because i know my hips and knees are going to get worse over time, not better!) It will also be located on a minimum of 20 acres, as i hope to eventually become as self-sufficient as possible, including meat sources. it will also have a multipurpose library/craftroom/games room (hubby and i are readers, and we have a fair number of hobbies)


(via)
My primary house design has always been rather barn-like (large, lofty, exposed timbers, shaped rather like a traditional 'red barn' ) but i'm starting to reconsider. the merits of a partially submerged (subterranean) house are just too great to ignore:
-greater energy efficiency for heating (like having geothermal heat, without the pump, pipes or fans)
-low maintenance, due to extra-sturdy materials used in original construction (like stone and concrete)
-long lifespan of the house, again b/c of the sturdier materials

Other cool reasons to have one include: greater fire resistance, amazing sound-proofing, more easily defensible against zombie attacks, and the possibility of building in hidden rooms and escape tunnels (i've always love the idea of hidden stuff in houses!)

also of consideration is the fact that a bermed home should work as well here, in a zone 2b/3a climate as it does in warmer ones, unlike a lot of other green building techniques (i'm thinking about adobe, cob, straw bales etc) which just don't seem to perform efficiently enough when it's -40 with windchill.

(via)

with all the available technologies for solar energy, drainage, and skylights, i think a house like this would not only be 'doable' but in fact probably darn comfortable to live in!

some links to info on bermed or other underground housing:
http://www.greenhomebuilding.com/QandA/earthshelter/how.htm answers lots of questions about different methods
http://www.lifeunplugged.net/greenbuilding/earth-berm-and-earth-sheltered-home.aspx has lots of alternative living information
http://everything2.com/title/Building+an+underground+house a rough-and-ready how-to

i am fortunate to have come from a family of handy guys, so when i finally get to the point of owning a chunk of earth, i think between them and my friends and i, we can do a substantial amount of the construction work ourselves, saving a HUGE chunk on costs. However, this is still just a dream. Gotta get myself back out into the country, and start looking for some good (read cheap) land.

Sunday, April 11, 2010

Local eating: a quest for knowledge

I have had it in my brain since the beginning of the '100 mile diet' movement, that that would be a great idea to work towards. After all, less travel should technically = less cost, and i'd be more likely to deal with the farmer/maker in person, therefor passing the buck directly to them.

This is still just an idea at this point, however, for a few reasons:
1. low income household means buying hugely bulk (like a 1/4 cow) is very difficult, and handmade local items are often more expensive than more distant varieties
2. 2 small very noisy and active kids make it a huge production just to get out of the house, so searching out farmers markets and out of the way shops is nigh-on-impossible (just getting out to the bank and a grocery store uses up most of my patience!)
3. renting a house, and one without a garden makes growing my own hard/impossible (though my window garden is doing as nicely as can be expected)

Last year, i made some headway on the 'make it yourself' vein by teaching myself how to do boiling water canning. i also took the opportunity to use that new skill to make Yuletide gifts for everyone! it was very... cost effective, and _hopefully_ appreciated.

rainbow peppers. Mmm mm spicy!


This year i'm doing more indoor growing, and have made initial attempts at breadmaking ( i have found a no-knead recipe that's edible... a bit heavy though....)

my goal (within the next year, maximum two) is to reduce my Imported purchases (imported being from out of country) by 50% for food goods, and 5% for all other items. To do this, i need to start re-assessing my family's diet, and research a 'complete' list of foods that can be made locally, then work towards sourcing these more local foods.

Do you eat locally?
Do you grow your own?
What about clothing/paper goods/ etc? can you buy local products?

Thursday, April 1, 2010

Getting into the spring of things - what have YOU been doing?

yup, this plant is a lush! heh.

 some newly transplanted lavender

newly planted seeds for myself (and, assuming everything grows, maybe a few to gift!)

My recently planted seeds include: italian parsley, grolau chives, globe basil, good king henry, ground cherries, Anaheim chiles, and a bunch of others. most of them will be kept indoors, excluding the ground cherries. Some may be indoor/outdoor, but my findings last year were that the ones that were taken outdoors grew MUCH slower and more poorly than the plants on my windowsill .

i also whipped up these little puppies: 
what are they? why, felted soap 'stones' of course! 
and before you say 'wtf?' i found the instructions on a blog i was following (no, i don't remember which one, but the directions i used were from Martha ) and thought that it'd be an interesting craft to try. it was! i just used two whole bars (too lazy to do the 'reshaping' step) and some of my bits of not-yet-handspun roving. they exfoliate nicely in the shower/tub when only slightly wet, and make a great lather when sopping. should be useful for camping!

just finished this crochet bag. got the pattern from The Sunroom. it works up quite quickly and is a fun little stash-buster! (not that it actually 'busted' any of my stash... but that's neither here nor there!)


on a more historical note, have been doing a little stone working. Soapstone, to be precise.
I went and bought a 3x3x5" block of stone, and have cut about a third of it up. These bits will all end up looking like the ones above...
What are they, you may ask. Well, these are whorls (weights) for drop spindles. I'm hoping to have them completed and on shafts so that i can start getting used to spinning with the different weights.

And if you say 'drop spindle? hunh?', i point you to this link, because it's quicker than trying to explain (and frankly, i gotta go deal with the kids, rather than blog!)

So what have YOU been doing this spring?